Alcohol has use beyond getting sloshed in the woods, although that might be just the thing you need after a global meltdown. Alcohol can also be used as a sterilizer, as a topical numbing agent, a trade item, and more. Being able to make your own alcohol is a valuable asset. As you develop your other skills, such as plant identification, foraging, and homesteading, you can apply these skills to distilling and brewing alcohol. As long as you have the skills and materials, you will be able to make a variety of alcohols in a post-collapse world using produce from your regional area as the primary ingredients.
The basics of brewing your own alcohol.
Alcohol contains three main ingredients: Yeast, Water, and Sugar. You can make alcohol from pretty much any ingredient, however, starchy and sugary produce such as cereal grains, potatoes, berries, and apples will work best. Humans have been brewing alcohol of various kinds for millennia. Ancient humans brewed alcohol, from beer to whiskey, from the ingredients found in their local region. Whether you are making spirits, beer, cider, mead, wine, or even sake, the basic process is the same––and you can do it from almost anywhere with very few supplies.
Growing your own brewing supplies is the best way to be self-sustaining.
As a survivalist, you should be able to identify the edible wild foods in your area, but another important skill is gardening. Growing your own food and medicinal herbs is a key part of your long-term survival. When it comes to brewing alcohol, the most sustainable brewing practice is one that uses the materials grown by your own hands.

Creating a self-sufficient homestead requires careful planning. Knowing all the variables is a key part of a successful harvest, year over year. When brewing your own alcohol, knowing which plants, fruits, and herbs can be turned into a delicious blend requires experience. Knowing your hardiness zone, soil type, and being familiar with your growing season will help you successfully plant your garden every year.
Plan your brewing around your garden so that you are always using the freshest produce. This will ensure flavour, and a high-quality product––all the better to barter with.
Basic supplies for making your own alcohol.
-
6.8 Gallon plastic buckets
Made from high-density polyethylene plastic, these buckets are designed to be sturdy. You need a bucket with an o-ring in the lid that allows it to seal, and that’s it. You don’t need fancy glass carboys, you don’t need to spring for “food grade” buckets––all buckets are designed to be food-grade quality. In addition, buckets are light, can be easily transported, and have extended uses beyond making alcoholic beverages, such as food and water storage. Ensure your lid has a hole with a rubber seal to accommodate the airlock.
-
Airlock
 There are a couple of styles of airlocks but they all serve the same purpose: maintain the seal while allowing gasses produced from fermentation to escape. These ensure the sterile environment needed to brew safely is maintained using water and pressure. The gases from brewing are able to escape, while harmful bacteria and pests are unable to enter and spoil your hard work. You can purchase airlocks, or make your own using simple materials.
-
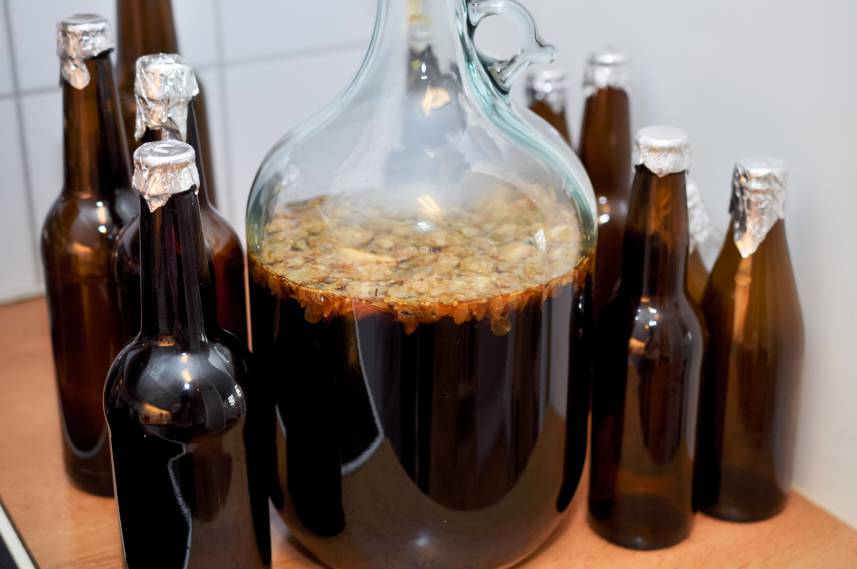
Carboys
Glass carboys are not essential, but they are incredibly handy. If you’re building all the necessary materials for brewing alcohol of any kind, finding several glass carboys will be a great asset. You can also make makeshift carboys from any found glass container. Ensure they are clean and have a lid of rubber stopper that will fit, make a hole, and attach the airlock of your choice, whether homemade or store-bought.
-
Still
If you are planning to make moonshine, which can act as an antiseptic, you will need a still. You can convert almost any fermented liquid into alcohol, from brandy to vodka. Making or buying a high-quality still is an essential part of safely distilling. Moonshine can be incredibly dangerous when you are not careful. Most stills are made from copper, partially to withstand the necessary temperature and pressure, but mostly to eliminate the sulphur which naturally arises in the distilling process.
-
Yeast
While you can stock up on commercially available yeasts, it is also an incredibly valuable skill to learn to extract the yeasts that surround us. There are an infinite amount of wild yeast strains, while commercial yeasts are produced from a single strain. In making alcohol, many of the wild yeasts are either Brettanomyces or saccharomyces, and they are often found on the products you use to brew alcohol. Learning to cultivate wild yeast is valuable for making bread, yogurt, and brews alike. Packaged yeast has a relatively short shelf life, so knowing how to build a starter and keep it flourishing is a great skill for a prepper.
-
Large pot
When making beer, you will need to boil a large amount of water, grains, and hops. Making your wort is like making a giant cup of tea. You’ll want a pot large enough to fill your fermentation buckets with tasty wort, and one that can potentially withstand being placed on a fire if you’re brewing from your bug-out location.
-
Hose (Siphon)
A clear plastic hose is used to move your fermented liquid into a new container––a technique that removes the dead yeast and brewing materials that have settled to the bottom of your container. Depending on what you’re brewing, you may need to repeat this process a couple of times. Once complete, the hose will allow you to syphon your brew into bottles for ageing. Many kits are sold with a pump to keep this process sterile.
-
Bottles
Glass bottles will last forever and can be continuously sanitized and re-filled. Having a selection of bottles will be necessary for your brewing process. In a survival situation, you can also recycle found glass bottles, as long as you're able to sanitize them. You will need corks or lids to seal your bottles once they are full. You can use swing-cap bottles, but they are more expensive per bottle.
-
Hand Corker
A handy tool that will help you seal your freshly filled bottles. Easy to use, and relatively small to store.
-
Clean Water
Water is an essential component of alcohol. Ensuring you have access to clean water will not only protect you but will ensure your brewing doesn’t go astray.
A survival guide to brewing beer.
Brewing beer can be done with minimal growing and foraging. Hops grow all over North America, and cereal grains are relatively easy to either store or find and process with limited technology. One important way to prep for the post-collapse is to have seeds ready for growing and harvesting your own grains and hops. Ensuring you are able to grow your own food as well as identify edible plants in your region is a necessary component of survival, and beer is no exception. Growing your own supplies is a critical part of self-sufficiency, and easier than you think.
The most complicated part of brewing beer is ensuring that all your tools and supplies are sterilized. There are several powdered sanitizers that you can stock if you plan to continue brewing beer or making wine after a collapse.
Brewing ale is the easiest style of beer to brew. This is because any mistakes can be fixed easily, and they can be salvaged more easily than other styles of beer. For brewing beer, you will need these 4 main ingredients:
- Starch such as malted barley––which is a saccharide or sugar
- Hops––there are ever-increasing varieties, they also grow in the wild
- Brewers Yeast––made from saccharomyces cerevisiae
- Water––regional water can provide flavour for different types of beer
There are several styles of beer that can be brewed, and once you get the hang of things, you’ll be able to experiment with several different styles. The basic steps for brewing beer are:
-
Malting
Malting is a process where you soak the grains (usually barley, but you can also use wheat, rice, and more) until it begins the germination process. It is then dried in a kiln and sold to brewers. This process allows the starches to become fermentable sugars by creating enzymes. You can store pre-malted grains, or learn to do this on your own. For most at-home brewing, buying and storing grains and malt is recommended.
-
Making the Wort
The wort is the liquid that will ferment. Using a muslin bag or cheesecloth, add your grains and steep. Think of it as a giant tea bag, with all your hops and grains steeping in the hot liquid. Depending on the grains, you will need to soak for 20-60 minutes to extract all the sugars from the grain.
Once you get familiar with this process, you’ll be able to determine the recipes for beer that works best for you. You can try a beer kit for your first time brewing, they will often include all your materials and recipes for brewing. This is a great way to familiarize yourself with the process. Many of these kits include grains, liquid malt, yeasts, and a variety of hops. Each one will be different, but it is a good way to familiarize yourself with the recipes and processes of making beer.
If you grow your own hops, keep in mind that brewing with wet hops is harder than using processed hops (which often come as little pellets). After a season or two, your hop vines should be producing a ton of hops, which is good, because you’ll be needing them. When brewing your beer with fresh hops:
-
Use more hops than you think is reasonable. Fresh cones aren’t as concentrated, so to get the right level of flavour, you’ll need to add more!
-
Use your fresh hops within 3 days of harvesting for best results. Plan your brew day and have all of your supplies sanitized and ready ahead of your harvest.
-
Fermentation
Once the wort has cooled to less than 80ºF, you can add the yeast. The fermentation process is what turns your malty tea into beer. The yeasts will eat all the sugar in your wort, converting it into ethyl alcohol and carbon dioxide gas. This gives your beer its alcohol content as well as carbonation.
-
Ageing
Once fermentation is complete, your beer needs to age. This process can take a couple of weeks to up to a year. Different beers will require different lengths of time ageing, and the only way to get more familiar with this process is to try it. On average though, most homebrews can age about 4 weeks before bottling.
Make homemade wine from locally foraged fruit. 
Fruit wines can be made out of just about anything. Foraging in your region can produce delicious results. Learn about the fruits which grow naturally in your region, such as berries, apples, rhubarb, and grapes. This will be one of the easier alcohols to make after the collapse, as long as you have a sturdy place to store your materials and bottles. Wine is similar to beer in that it needs three main components:
- Sugar (from fruits and added)
- Yeast
-
Water
In some cases, you will need to add extra sugar in order to have the sugar content high enough for the yeast to convert into alcohol. You can measure the amount of sugar in your wine using a Brix hydrometer. The essential rule to follow: more sugar = higher alcohol wine. The process of adding sugar to your wine is called chaptalization. You can use any sweetener, such as brown sugar, table sugar, honey, molasses, and even raisins or other dehydrated fruit. If you're in the woods, knowing how to process and utilize honey and molasses will be a great skill to have.
Yeast is the next important component of making wine. Until you are very familiar with the process of making alcohol, it is highly recommended that you use specialty yeasts that are sold specifically for use in making alcohol. You can stockpile these, to some degree, if you keep them from moisture, air, and damage. Make sure you keep a detailed record of expiration dates to help you brew before your materials go to waste.
Crushing the fruits and saving the juice is the most important part of the process. You can choose to leave the skins on during fermentation, as this will increase both the colour and flavour of your wine. There are a number of ways of doing this, but finding a fruit press will be the best long-term solution, especially for apples and other hard fruits that can be difficult to extract juice from.
Take your juice and add yeast. Allow this mixture to ferment. This process takes a few days, after which you will be able to move the mixture into your secondary container. When you siphon your fermented juice from one container to the other, ensure you get as much liquid as possible without picking up any of the sediment (also known as lees) from the bottom. This will ensure your final product is clear, and that your flavours are uncompromised.
Kilju, or sugar wine, is a survivalist’s alcohol.
You can make Kilju, the Finnish name for sugar wine, from table sugar, water, and yeast. If you push the process, kilju can be ready in as little as a week. Many people who make this sugar wine add citrus or herbs to mask the slightly off-putting flavours. You can add fresh fruit, or even frozen juice concentrate to offset the flavour. Once you know how to make sugar wine, it is easy to develop a recipe that reflects what you have locally available.
In a survival situation, Kilju can be made inside of a sanitized pop bottle, so it is a good thing to know how to make it. In addition, kilju can be distilled, making neutral alcohol perfect for sanitizing or bartering. You can make kilju from naturally occurring sugars like honey or molasses instead of table sugar, so making it in the middle of the woods is completely viable.
-
Boil sugar and water to combine
This is your wort. You can add juice or whatever you have on hand to this process, including dried fruit like raisins. The higher the sugar content, the higher the potential alcohol content of your finished Kilju (sugar wine). However, too much sugar can stress the yeast and lead to a bad fermentation. Experimentation is essential.
-
Cool to lukewarm
Ensure your wort is fully cooled, or the temperature will kill the yeast.
-
Add your yeast
Any yeast you can forage will do. Ideally, you’ll be using a yeast specific to alcohol, but baking yeast or even live yeast from a baker will suffice.
-
Put in your carboy or pop bottle
Ensure you do not tighten the lid if you use the pop bottle, or you will be cleaning up quite a mess. The pressure from the off-gasses will cause the pop bottle to burst. If you use a carboy, utilize an airlock to let gasses release while maintaining sanitary conditions.
-
Ferment
This process can take a few days to a couple weeks. You’ll be able to tell when the fermentation is complete because the lees (yeast sediment) will fall to the bottom, and the liquid will stop bubbling in the carboy.
-
Drink
Typically, you want to consume within 2-4 days. You can bottle and age Kilju, however, it is typically meant to be drunk immediately after it is finished. This low-budget and easy to make alcohol will give you a pretty rough hangover, be warned.
Making alcohol at home is an indispensable post-collapse skill.
Disclaimer: In many places, making homemade moonshine and hard alcohol is illegal. Please be aware of your local bylaws.
The necessary part of making any alcohol comes down to the copper still. You can convert your fruit wine into brandy, a mash of grains into whiskey, and your garden potatoes into vodka, but you will need a high-quality copper still. The process of turning your fermented wort into alcohol is called distillation.

As above, making alcohol requires three main ingredients: sugar, yeast, and water. You can get fancy about what you use as a mash, from grains to potatoes or even foraged berries, but the main components stay the same.
-
Make your wort or mash
In the same way as brewing beer, you can boil water and steep your grains to create your wort or mash. You can use anything from wine, wheat, potatoes, or kilju for your distillation, experimenting with your base is a great way to have fun with this process and use produce from your garden. Different types of alcohol will require different types of mash, for example, vodka uses potatoes whereas whiskey utilizes malted grains.
-
Ferment
The fermentation process can take a couple of days to a couple of weeks, you’ll be able to tell when it is done because the mash will stop bubbling and become settled. How long this process lasts will depend on the amount of sugar and the type of yeast you used. As you become more experienced, the process of fermentation will be easier to predict.
-
Distill
The distillation process takes some time to get used to. Learning how to use your still will take practice. Once your wort is fully fermented, you can transfer it to your still using a syphon––ensure that you don’t bring any of the sediment along for the ride.
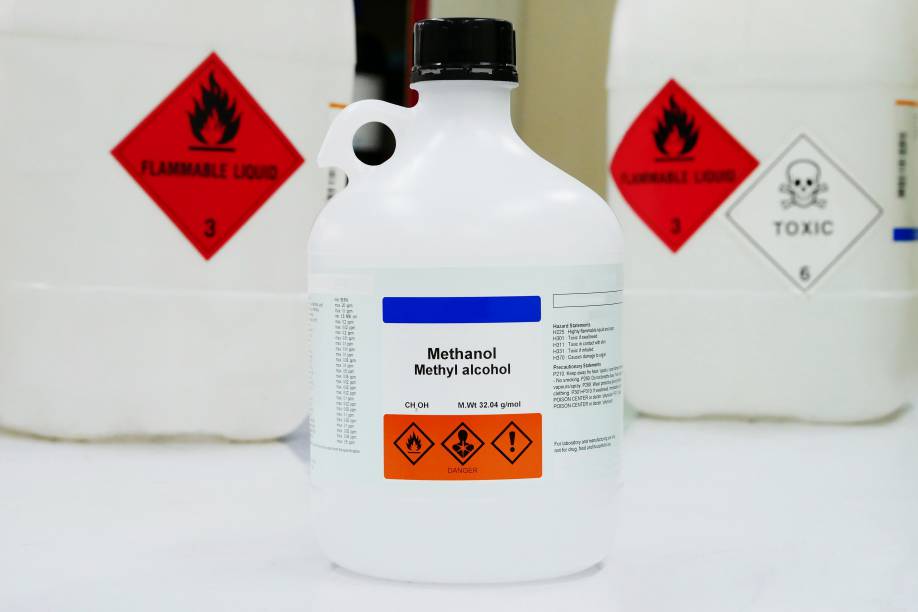
When you use your distiller, the temperature is of key importance. You will need to maintain a temperature between 174-190ºF to properly distill your alcohol. Any liquid that comes before your still reaches this temperature is highly poisonous methyl alcohol, and you should discard it.
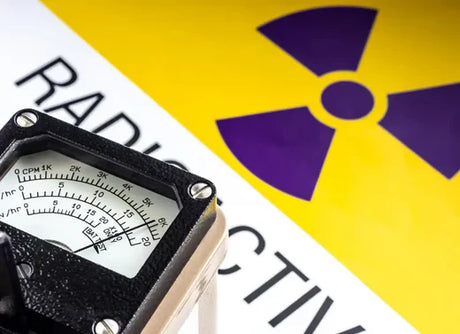
Methanol is a serious danger in producing homemade moonshine.
Methyl alcohol, or methanol, is incredibly dangerous. As little as 10ml can be extremely dangerous, and 30ml is enough to kill a person. When you begin to learn how to make moonshine, it is incredibly important to know about methyl alcohol. Methanol is a by-product of producing alcohol, however, it is often diluted in such large quantities of liquid that it isn’t a threat. When you distill grain wort or fruit alcohols into moonshine, you are removing all the liquid that previously diluted the methanol, making a toxic reduction.
To ensure you discard the methyl alcohol from your moonshine batch here are some tips you can follow to be safe:
-
Monitor the temperature of your still
A good still will contain a temperature gauge, any distillate that is produced before the temperature in your still reached 174ºF will be methanol. Because methyl alcohol boils at a lower temperature than ethanol, you will want to discard anything that comes out before you’ve reached the boiling temperature of ethanol.
-
Fruit wines will produce more methanol than grain mashes
If you’re looking to produce grappa or brandy from your locally foraged fruits, this is an important thing to know. Methanol is more prevalent in fermented fruits than in fermented grains, as it is naturally occurring in many fruits. Methanol is often an unintended by-product of fermentation.
Making alcohol at home is a skill all preppers can develop.
In survival scenarios, morale plays an essential role in keeping one's mental edge sharp. Whether you are trying to build a self-sustained homestead or are looking to accumulate items to barter with in the post-collapse, brewing alcohol is a necessary skill to develop. Alcohol has many functions and has been brewed and used by humans since the creation of societies.
Beyond the utility of alcohol for medicinal and bartering purposes, small indulgences such as a fine cigar can offer a grounding experience in otherwise chaotic conditions. A rich smoke from the Partagas cigar Collection can serve as a momentary escape, helping to maintain balance and composure when the situation permits. Of course, these should always be enjoyed responsibly and only when circumstances allow a safe pause.